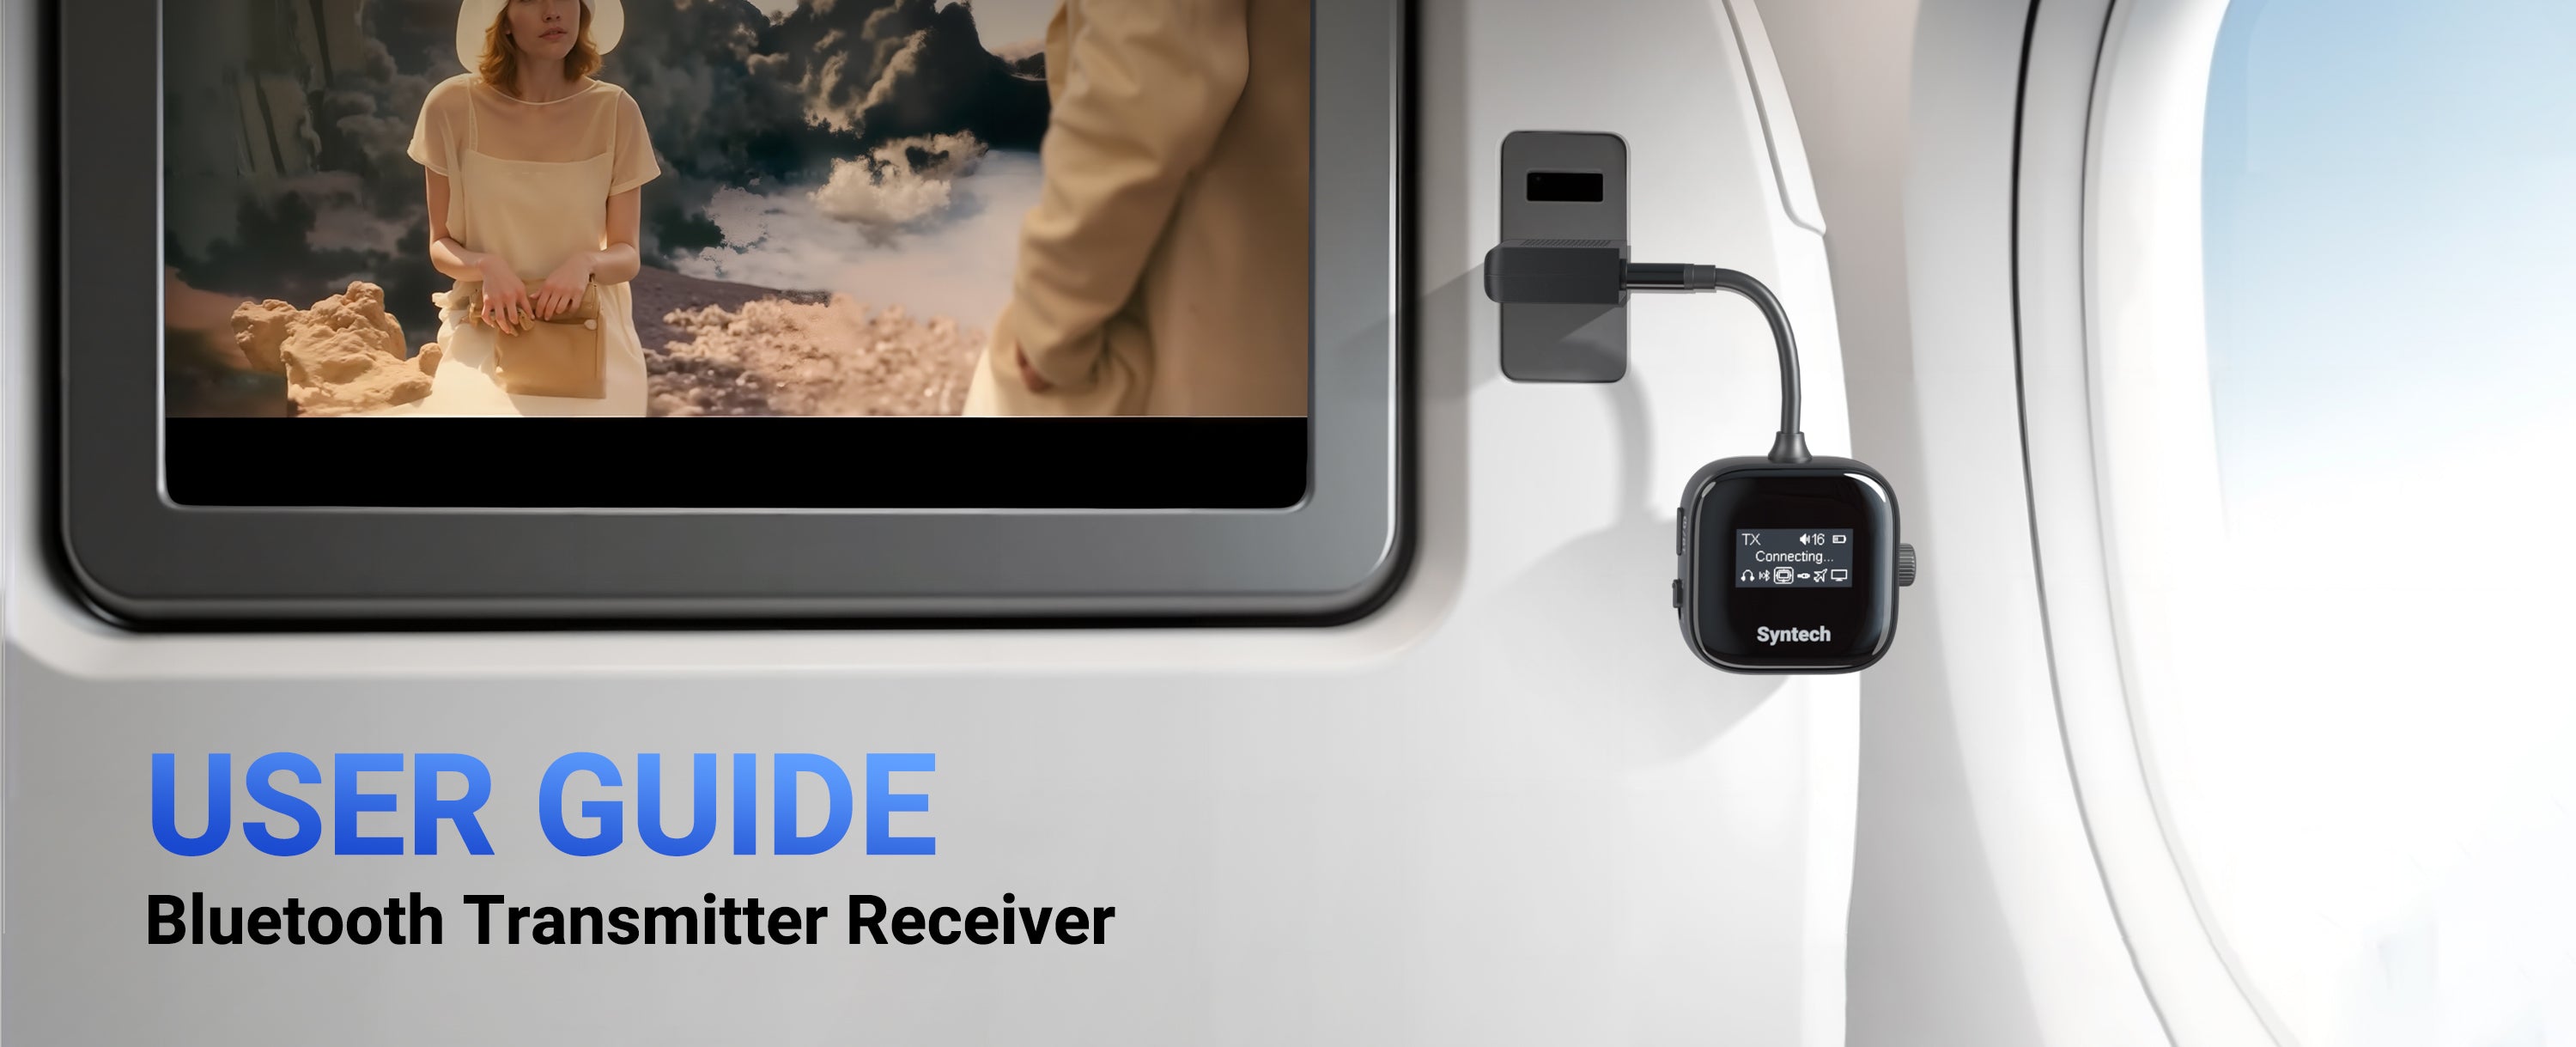
How to Use Syntech's Bluetooth Transmitter Receiver?
Follow the step-by-step guide demonstrated in the video below for a seamless setup and optimal performance with your Syntech device.
Frequently Asked Questions
Ensure the switch on the adapter is set to "TX" mode. Open your headphone's charging case and check if the indicator light is flashing. If it's not, press the button on the charging case to reset the headphones. Once the indicator flashes, the adapter should be able to search for and connect to your headphones.
Some third-party Bluetooth devices may experience compatibility issues, leading to longer pairing times (around 120 seconds), unstable connections, or high latency. If this happens, try reconnecting or using a different set of headphones for better performance.
Ensure the adapter is set to "TX" mode and your headphones are paired successfully. Check if the airplane's audio output port is a functional dual-hole port. Some ports may be damaged due to aging. Use the included double-ended audio adapter to connect the transmitter to the airplane's audio output securely.
- In TX mode, turn the knob on the Bluetooth adapter clockwise to increase the headphone volume.
- In RX mode, adjust the volume on both the external device and the adapter for optimal sound.
When your headphone's name appears on the screen, use the knob to select it and press the Pairing Button to confirm the connection.
Bluetooth transmission may cause sound delays and quality loss, particularly with third-party cables (e.g., XLR ports). The adapter is not ideal for highly sound quality scenarios, such as music performances or instrument use. High latency may also result from your headphones' reception capabilities.
- Function Limitations: In TX mode, functions like volume adjustment, pause, and song switching are unavailable while searching for devices.
- Play & Pause: Pausing only interrupts sound transmission but does not halt playback progress.
The memory function may not be compatible with headphones using proprietary protocols. For example, AirPods prioritize connecting to Apple devices like iPhones or iPads. You may need to reactivate the Bluetooth function to reconnect manually.
The adapter features advanced decoders for optimal performance. If sound quality issues arise, double-check your audio source and ensure it is high quality.
Ensure the switch on the Bluetooth adapter is set to "TX" mode. Connect the adapter to your car's 3.5mm AUX port using the provided AUX cable. Then, enable Bluetooth on your phone and search for "B101" to pair. If the device doesn't appear, press the Bluetooth pairing button on the adapter five times to reset it and restart the pairing process.
Yes, the adapter does not support microphone functions. While it works with devices like laptops, mobile phones, and Bluetooth speakers, please note that it is designed primarily for audio transmission, not voice input or calls.


Pairing and Resetting of Popular Headphones
Syntech Bluetooth transmitters / adapters work with most Bluetooth receiving devices on the market. Please make sure the device is put into pairing mode when you try to pair / connect them.
• Note 1. Most Bluetooth devices re-connect to their last paired device automatically when turned on. Please TURN OFF Bluetooth on all devices which previously paired with it.
• Note 2. If you're still experiencing problems, then please try to clear the pairing history of your Bluetooth headphones / speakers. This will fix a lot of potential problems. Find your product brand below this section for details.
Step-by-Step Guide:
Step 1:Turn Off Bluetooth on Other Devices:
1. Ensure Bluetooth is turned off on all devices previously connected to your Air Pods to prevent automatic reconnection.
Step 2:Reset Your Air Pods in Their Case:
1. Place your Air Pods back into their charging case.
Step 3: Enable Pairing Mode:
1. Close the case lid, then flip it open.
2. Press and hold the button on the back of the case until the front LED starts flashing white.
Once in pairing mode, your Syntech transmitter/dongle can search for and connect to your Air Pods.
Note: Refer to the related information section for additional support with Syntech devices and popular Bluetooth headphones.
Pairing button:


Pairing mode:

Step 4: Activate Pairing Mode on Your Syntech Bluetooth Transmitter:
Refer to the transmitter's user guide if you're unsure how to enable pairing mode. Once both devices (Air Pods and transmitter) are in pairing mode, place them close together and allow a few seconds to connect. The LED indicators on both devices will stop flashing once paired.
If the connection fails, Factory Reset or Clear the Pairing History on both devices, then try again.
Step 1: Place your Air Pods (or Air Pods Pro) in their charging case. Close the lid and wait for 30 seconds, then reopen the lid.
Step 2: On your iPhone, iPad, or iPod touch:
- Go to Settings > Bluetooth.
- Tap the "i" icon next to your Air Pods.
- Select Forget This Device and confirm.
(If you don’t see your Air Pods listed, move to the next step.)
Step 3: Reset your Air Pods:
- Keep the lid open.
- Press and hold the setup button on the back of the case for about 15 seconds.
- Release the button when the status light flashes amber.
Your Air Pods are now reset and ready to pair again.


Step 1: Turn OFF Bluetooth on all devices previously connected to your Air Pods Max.
Step 2: Put your Air Pods Max into Pairing Mode.
- Press and hold the Noise Control button until the status light flashes white.
Step 3: Put your Syntech Transmitter into Pairing Mode.
- Refer to the transmitter’s user guide if you’re unsure how to enable pairing mode.
- Once both devices are in pairing mode, keep them close together and allow a few seconds to connect.
- Check the LED indicators on both devices to confirm a successful connection.
Troubleshooting Tip:
If pairing fails, try Factory Resetting or Clearing the Pairing History on both the Air Pods Max and the Syntech transmitter, then try again.


Step 1: Charge your Air Pods Max for a few minutes before starting the reset process.
Step 2: Press the Noise Control button and the Digital Crown for about 15 seconds.
- The LED status light will flash amber, then white.
Once the reset is complete, your Air Pods Max will automatically enter Pairing Mode and be ready to connect to a new device.

Step 1: Put Your Sony Headphones into Bluetooth Pairing Mode
Different Sony models have unique pairing methods. Refer to the list below for detailed instructions:
- Sony WH-1000XM4, XM3 (and XM2):
- Make sure the headphones are turned OFF.
- Press and hold the power button for 7 seconds until you hear the "Bluetooth pairing" voice prompt.
- LED Indicators:
- XM2: Flashes BLUE & RED.
- XM3 and XM4: Double-flashes BLUE.
- Sony WF-1000XM3 (Earbuds):
- Put the earbuds on.
- Press and hold the touchpads on both earbuds for 7 seconds.
- You'll hear the "Bluetooth pairing" voice prompt.
- Sony WI-1000X:
- Ensure the headphones are turned OFF.
- Press and hold the power button for 7 seconds.
- The LED indicator will flash BLUE & RED, and you'll hear the "Bluetooth pairing" voice prompt.


If you encounter pairing issues, reset your Sony headphones using the following steps:
Sony WH-1000XM4
- While charging, press and hold the power button and the CUSTOM button for 7+ seconds.
- The LED will flash blue 4 times. The headset will reset and clear the pairing history.
- Delete the headset from your device's Bluetooth list.
- Re-pair the headphones.
Sony WH-1000XM3 (and XM2)
- Turn off the headset (ensure no USB cable is connected).
- Press and hold the power and NC/Ambient buttons for 7+ seconds.
- The LED will flash blue 4 times, indicating the reset.
- Delete the headphones from your device's Bluetooth list and re-pair them.
Sony WF-1000XM3 (Earbuds)
- Place the earbuds in the charging case and keep the lid open.
- Hold your fingers on the touch sensors (both earbuds) for 10 seconds.
- Release when the indicators flash red, then blue 4 times.
- Delete the earbuds from your device's Bluetooth list and re-pair them.
Sony WI-1000X
- Disconnect the USB cable and turn off the headset.
- Press and hold the power button and NC button simultaneously for 7+ seconds.
- The LED will flash blue 4 times, and the pairing history will reset.
- Delete the headset from your device's Bluetooth list and re-pair.

Step 1: Get your Bose Headphone / Speaker into Bluetooth Pairing Mode.
Different products tend to have a different-looking pairing mode... but not to worry, see below for the pairing mode for a list of Bose's most popular products.
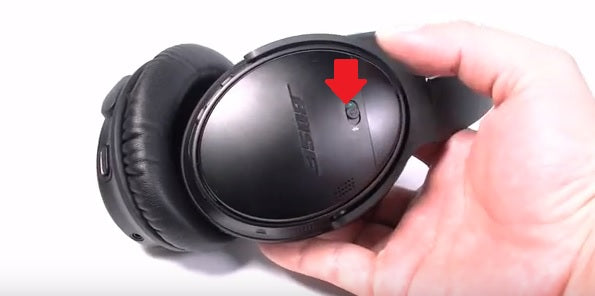
Bose QuietComfort 35 (QC35): With the headphone ON, slide the power switch to the Bluetooth symbol and hold it there until you hear “Ready to connect” or the Bluetooth indicator blinks Blue.
Bose 700: With the headphone ON, press & hold the power button for 3 seconds to put the headphones into pairing mode. You'll hear "ready to connect another device" and the Bluetooth indicator will slowly pulse BLUE.
Bose QuietControl 30: With the headphone ON, press & hold the Power/Bluetooth button until you hear “Ready to pair” or you see the Bluetooth indicator blinking BLUE.
Bose SoundLink Revolve (+): With the speaker turned ON, press & hold the Bluetooth button until the Bluetooth indicator blinks BLUE, and you hear, “Ready to connect another device.”
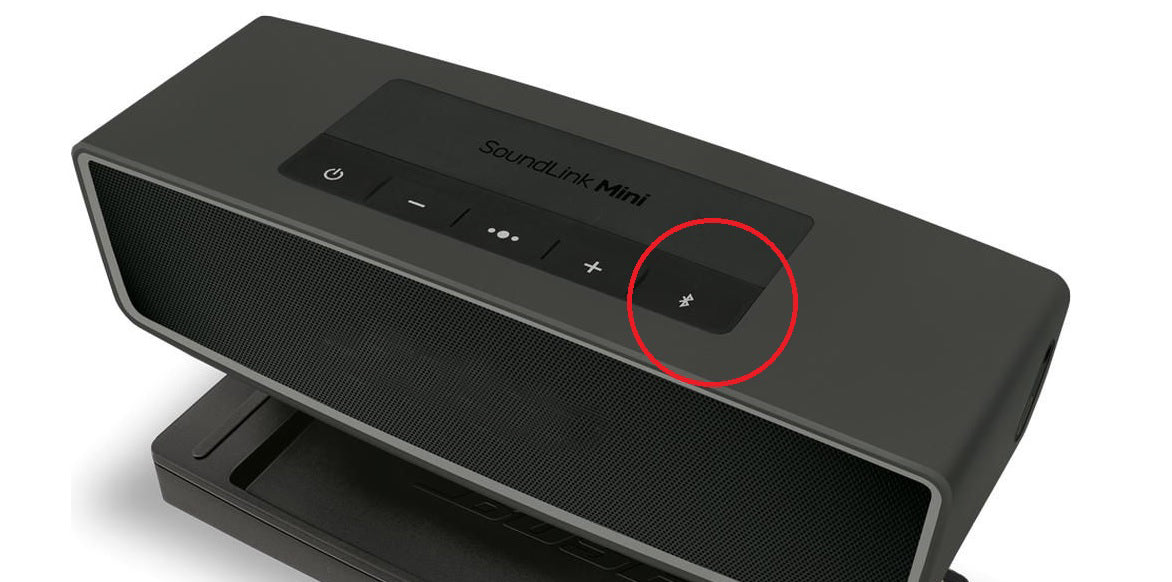
Bose SoundLink Mini (II): With the speaker turned ON, press & hold the Bluetooth button until the Bluetooth indicator blinks BLUE and you hear, “Ready to pair another device.”
Bose SoundLink Color (II): With the speaker turned ON, press & briefly hold the Bluetooth button until the Bluetooth light starts flashing BLUE slowly.
Step 2: Put your Syntech Bluetooth transmitter into Pairing Mode as well.
Please refer to its user guide if you're not sure how. With both devices in pairing mode, keep them close to each other and give them a few seconds. Please check their respective LED indicators to make sure that they've connected.



Reset Bluetooth Pairing on your Bose Headphone / Speaker
Bose QuietComfort 35 (QC35):
1. Power on your headset
2. Slide the Power switch to the Bluetooth icon and hold it for 10 seconds until you hear Bluetooth device list cleared.
Bose 700:
1. Press and hold the Power/Bluetooth® button until you hear “Bluetooth device list cleared” and the Bluetooth light slowly pulses blue
2. Delete your headphones from your device’s Bluetooth list. The headphones are now ready to connect.
Bose QuietControl 30:
1. Power off the headphones
2. Press and hold the Power/Bluetooth® button for 10 seconds, until you hear "Bluetooth® device list cleared"
3. Delete your Bose® QuietControl® headphones from the Bluetooth® list on your device. All devices are cleared and the headphones are ready to pair a new device
Bose SoundLink Revolve (+)/Bose SoundLink Mini (II)/Bose SoundLink Color (II)
1. On the speaker, press an hold the bluetooth® button for 10 seconds, until you hear "Bluetooth® device list cleard"
2. On your mobile device, delete the speaker from the Bluetooth® menu. All paired mobile device are cleared and the speaker is read to pair again.
Step 1: Get your Beats Headphone / Speaker into Bluetooth Pairing Mode.
Different products tend to have a different-looking pairing mode... but not to worry, see below for the pairing mode for a list of Beats' most popular products.
Beats Studio 3 Wireless: With the headphones turned OFF, press & hold the power button for 5 seconds until the five Fuel Gauge lights start flashing.
Beats Solo 3 Wireless: With the headphones turned OFF, press & hold the power button for 5 seconds until the five Fuel Gauge lights start flashing.
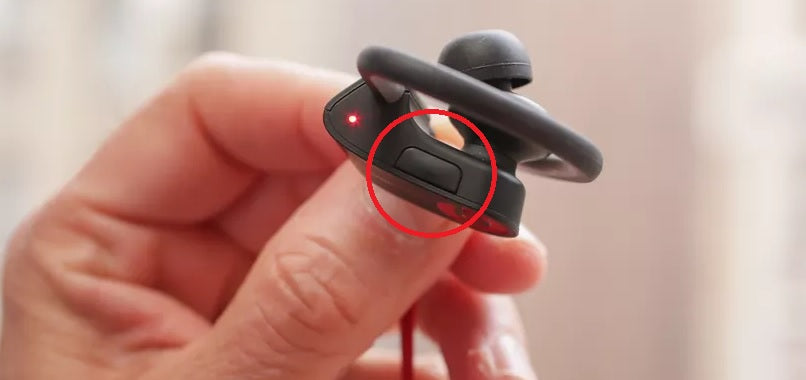
Powerbeats Wireless: With the earbuds turned OFF, press & hold the power button for 5 seconds until the LED indicator starts flashing.
Powerbeats Pro: Place the earbuds inside the case and press & hold the System Button for a few seconds until you see the pairing light flash.
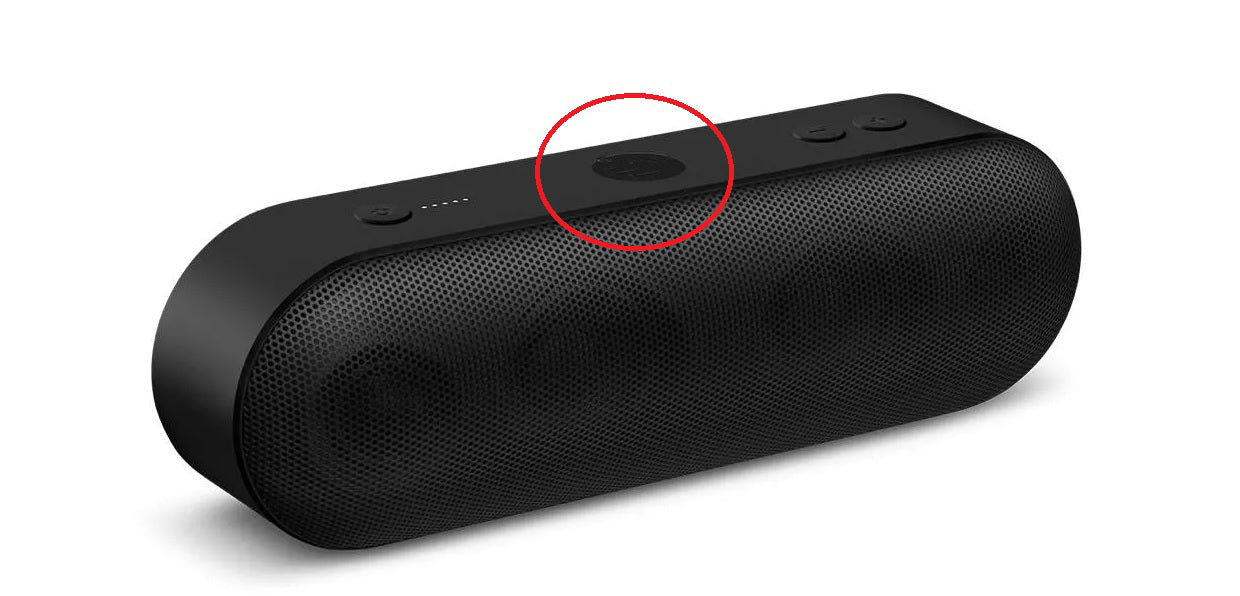
Beats Pill+ Speaker: Turn the speaker ON, press & hold the "b" for 3 seconds until the Bluetooth LED located at the rear of the Pill blinks WHITE.
Beats X Wireless: With the earbuds turned OFF, press & hold the power button for 5 seconds until the LED indicator starts flashing.
Step 2: Put your Syntech Bluetooth transmitter into Pairing Mode as well.
Please refer to its user guide if you're not sure how. With both devices in pairing mode, keep them close to each other and give them a few seconds. Please check their respective LED indicators to make sure that they've connected.




Factory Reset/Clear Pairing History of your Beats Headphone / Speaker
Beats Studio 3 Wireless:
1. Hold down the power button and volume down button for 10 seconds.
2. When the Fuel Gauge flashes, release the buttons.
3. Your headphones are now reset and ready to be set up with your devices again.
Beats Solo 3 Wireless:
1. Hold down the volume down button and the power button for 10 seconds.
2. When the Fuel Gauge flashes, release the buttons.
3. Your headphones are now reset and ready to be set up with your devices again.
Powerbeats Wireless:
1. Hold down both the power button and volume down button for 10 seconds.
2. When the LED indicator light flashes, release the buttons. Your earphones are now reset and ready to be set up with your devices again.
Powerbeats Pro:
1. Put both Powerbeats Pro earphones in the charging case
2. Press the button on the inside of the case until the indicator light flashes red and white, let go
3. The LED should be flashing white, which means they are ready to re-pair with your iPhone or another device
Beats Pill+ Speaker:
1. Use the Lightning-to-USB cable to plug your Beats Pill+ into a power source.
2. Turn the speaker on.
3. Hold down both the "b" button and the power button for six seconds. The Fuel Gauge flashes red six times. Your Beats Pill+ is now restored to the settings it had when you purchased it.
Beats X Wireless:
1. Hold down both the power button and volume down button for 10 seconds.
2. When the LED indicator light flashes, release the buttons. Your earphones are now reset and ready to be set up with your devices again.
Step 1: Enable Bluetooth Pairing Mode on Your JBL Device
Follow these steps based on your specific JBL product:
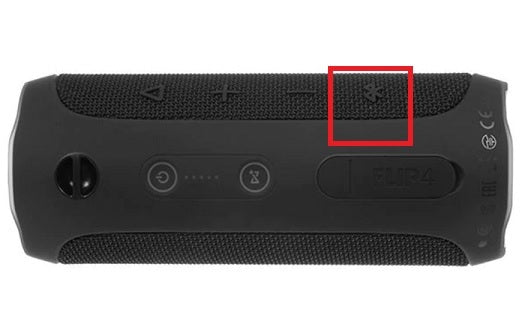
- JBL Flip 4: Turn ON the speaker by pressing the Power button. Then, press the Bluetooth button; you will hear an acoustic signal, and the speaker will enter pairing mode.
Step 2: Put Your Syntech Bluetooth Transmitter into Pairing Mode
Refer to the Syntech transmitter’s user guide if you’re unsure how to activate pairing mode. With both devices in pairing mode, keep them close to each other and wait a few seconds. Check the LED indicators to confirm the connection.



Step 1: Enable Bluetooth Pairing Mode on Your Jabra Device
Follow these steps based on your specific Jabra product:
- Jabra Elite 65t (or Elite Active 65t): Turn OFF the earbuds. Press and hold the Multi-function button on the Right earbud for 5 seconds until the LED flashes BLUE and the voice prompt announces pairing mode.
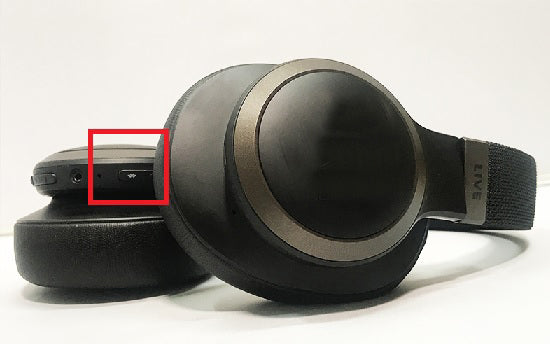
- Jabra Elite 85h: Press and hold the Multi-function button on the Right earcup for 3 seconds until the LED flashes BLUE and you hear a pairing announcement.
- Jabra Speak 710: Press and hold the Bluetooth button for 2 seconds until the LED indicator next to it flashes BLUE.
Step 2: Put Your Syntech Bluetooth Transmitter into Pairing Mode
Refer to the Syntech transmitter’s user guide if needed. Once both devices are in pairing mode, place them close together and wait a few seconds. Check the LED indicators on both devices to confirm they have connected successfully.


Jabra Elite 65t (or Elite Active 65t)
- Press the Multi-function button on the Right earbud for approximately 10 seconds.
- The LED will flash red first, then briefly flash purple.
- The earbuds are now reset.
Jabra Elite 85h
- Ensure the headphones are powered ON and not in a call.
- Press and hold the Volume Up and Multi-function buttons on the Right earcup simultaneously for 5 seconds.
- The LED will light purple, and you’ll hear a reset announcement.
Jabra Speak 710
- Press and hold the Answer and End Call buttons simultaneously for 8 seconds.
- You will hear “Factory reset” announced by the speakerphone.
Step 1: Activate Bluetooth Pairing Mode on Your Sennheiser Device
Different Sennheiser products have unique methods to enter pairing mode. Follow the instructions below based on your model:
- Sennheiser HD 4.50 BTNC (and HD 4.40)
- Ensure the headphones are turned OFF.
- Press and hold the power button for 4 seconds.
- The LED indicator will flash RED and BLUE, indicating pairing mode.
- Sennheiser PXC 550 Wireless
- Press and hold the Effect Mode Control button for 4 seconds.
- Listen for tones, and the voice prompts "pairing."
- The LED indicators will flash WHITE in sequence.
- Sennheiser HD1 M2 AEBT
- Ensure the headphones are turned OFF.
- Press the power button until you hear the "pairing" voice prompt.
- The LED indicator will flash RED and BLUE.
- Sennheiser Momentum True Wireless
- Put on the headphones.
- Simultaneously touch and hold the right and left control panels for 5 seconds.
- Listen for the voice prompt "Pairing" and a beep.
Step 2: Activate Pairing Mode on Your Syntech Bluetooth Transmitter
- Refer to your Syntech transmitter's user guide to enable pairing mode.
- Once both devices are in pairing mode, keep them close together.
- Wait a few seconds and check the LED indicators to confirm a successful connection.
Troubleshooting
If pairing is unsuccessful:
- Perform a factory reset or clear the pairing history on both devices.
- Try the pairing process again.
For further assistance, contact support@Syntech.com.



Download User Manual Guide
Can't Find What You Need?
Our Team is here to help


