
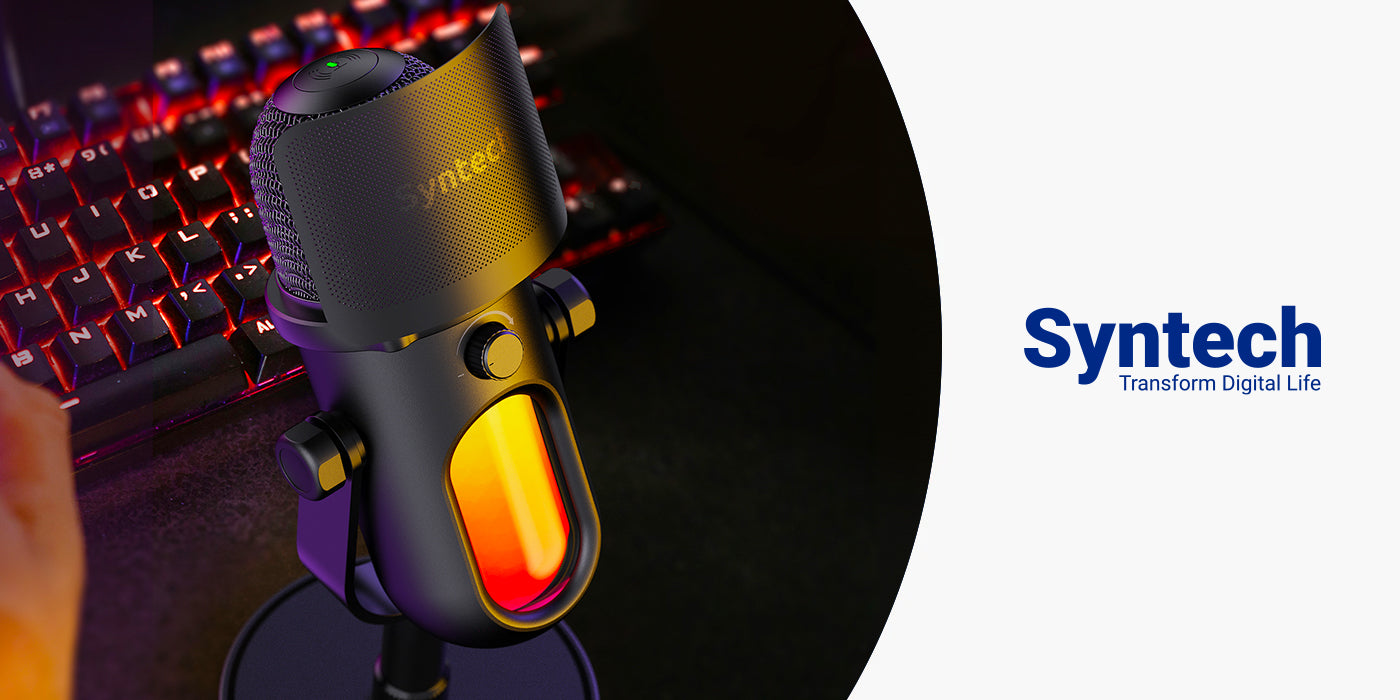
よくある質問
以下のビデオをご覧ください。
1. まず、接続したUSBポートが正常に機能しているかどうかを確認してください。別のUSBポートを試したり、マウスやキーボードなどの他の周辺機器を接続してテストしたりすることもできます。
2. 以下のビデオに従ってドライバーを再インストールします。
1. まず、パソコンのUSBポートが正常に動作しているかどうかをご確認ください。パソコンのUSBポートによっては、高サンプリングレートのマイクデータ転送に対応していない場合があります。Type-Cポートまたは別のUSB Aポートをお試しください。
2. パソコンのサウンド入力デバイスをマイクに設定し、対応するサンプリングレートを調整します。出力デバイスは、ニーズに応じてマイクまたは内蔵スピーカーを選択できます。
3. 以下のビデオに従ってください。
注記:
1. 低スペックのコンピュータでは、高サンプリングレートの録音がサポートされず、16ビットのサンプリングレートしかサポートされない場合があります。この場合、高サンプリングレートを設定すると、
サンプリングレートを高く設定すると、録音ソフトウェアが誤動作したり、音声が破損したりする可能性があります。まずはサンプリングレートを低く設定してから録音をお試しください。それでも問題が解決しない場合は、より高性能なコンピューターをご使用ください。
2. パソコンのサンプリングレート設定が完了したら、録音ソフトウェアを起動します。この時点で、ソフトウェアはパソコンと同じサンプリングレートを自動的にデフォルト設定します。個別に設定する必要がある場合は、両方のサンプリングレートが一致していることを確認してください。
マイクを初めてコンピュータに接続すると、デフォルトでコンピュータの音声がヘッドフォンモニタリングインターフェースに引き継がれます。コンピュータのサウンド出力デバイスを「コンピュータスピーカー」に設定するだけで、コンピュータから通常通り音声が再生されます。
1. First, please check if the USB port on your computer is functioning properly. Some computer USB ports do not support high sampling rate microphone data transmission. We recommend trying a type-C port or a different USB A port.
2. Set your computer's sound input device to the microphone and adjust the corresponding sampling rate. For the output device, you can choose the microphone or built-in speakers according to your needs.
3. Follow the video below.
MacBook currently does not support individually adjusting the microphone monitoring volume. You can try adjusting it on recording software that supports this function.
1. When the microphone is first connected to your computer, it will default to taking over the computer sound to the headphone monitoring interface. You just need to set the sound output device on the computer to Computer Speaker, and it can play through the computer normally.
2. Follow the video below.
When connecting the phone, the phone can't play out the sound at the same time as recording like the computer, and you need to disconnect the microphone to play out the sound after the recording is finished.
For Android: The microphone supports connecting the phone with Type-C interface.
For iPhone: The Type-C interface of the iPhone 15 series can be used normally. It is not recommended to use the Lightning interface of the iPhone, as the phone's port restricts the current output, resulting in the inability to display RGB lights and record properly. Unless using the official hub, there is another port to charge the iPhone while the iPhone is connected to the microphone.
- Touch: Turn on.
- Long press (2s): Turn off.
- Double-click to switch between 6 lighting modes, and single-click to cycle through 5 lighting effects within each mode.
- The RGB lighting effects cannot be adjusted while in mute mode.
- Power Off Memory Function: When the microphone is powered on or the RGB is turned on again, it will still be in the mode when it was powered on or off last time.
- Microphone and Headphone Settings: Adjust the gain to the desired level using the mic gain knob or headphone sound settings in your system's settings.
- Distance and Angle: It is recommended to speak within a range of 6-12 inches in front of the USB gaming microphone. Being too far or too close may result in poor sound quality.
- Environmental Noise: Use the microphone in a quiet environment to minimize background noise.
- Check the Microphone Cable: Ensure that the USB cable of the microphone is securely connected and not loose or damaged.
- The microphone's default setting is 48KHz/24bit, but it can support a maximum of 192KHz/24bit. To achieve this, please follow these steps:
- Ensure your system is set to 192KHz/24bit before turning on the microphone.
- Note that if your system or device configuration does not support these settings, achieving 192KHz/24bit may not be possible.
- Processing Power:Insufficient processing power in your computer can cause recording delays. Try closing other programs that are hogging system resources, or consider upgrading your hardware configuration.
- Driver Issue: Ensure that you have installed the latest microphone driver. Updating drivers can sometimes resolve lag issues.
- Encoding Settings: Some recording software or applications may have encoding settings that can adjust the size of the audio buffer to reduce latency. Check your recording software settings and try adjusting them.

100% Secure
Payment

Customer
Support

Guaranteed After-
Sales

30-Days Hassle-Free
Return
メルマガ登録して新製品発売、割引やキャンペーン情報等をGET!